
Last summer, I started learning Git, and I recently wrote a guide to help some of my classmates deploy a web app to Heroku using Git and Bitbucket. I chose Bitbucket over Github because Bitbucket allows you to create unlimited private code repositories; in an academic setting where every student has to work on a project with the same requirements, this is a Very Good Idea.
A disclaimer: I’ve only deployed one non-trivial Django app to Heroku, so my experience is limited.
Limitations: This overview is intended to be language agnostic. Check Heroku for specific steps required for your language or framework. Heroku has tutorials for Ruby, PHP, Node.js, Python (Django and Flask), Java, Clojure, and Scala.
Tools: Git, Bitbucket or Github, Heroku, a command line interface (Git-Bash or Cygwin for Windows), and your choice of web framework.
1. Create a git repo and origin branch on Bitbucket.
Install git and setup a Bitbucket account. In Bitbucket, create a team, create a repository, and copy the address address under “Clone.” This will be your origin. Your local machine (and your team’s local machines) will push to and pull from this repository. Clone your Bitbucket origin to your local machine.
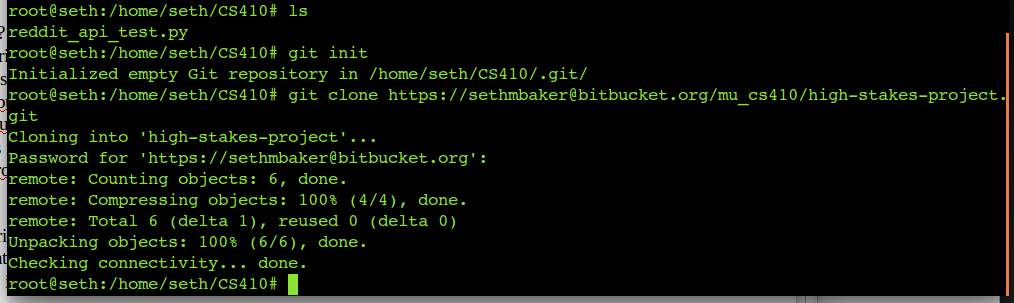 You now have a local repo setup, and it’s time to set up your remote origin branch.Copy the remote branch address from Bitbucket then create a remote branch in the command line.
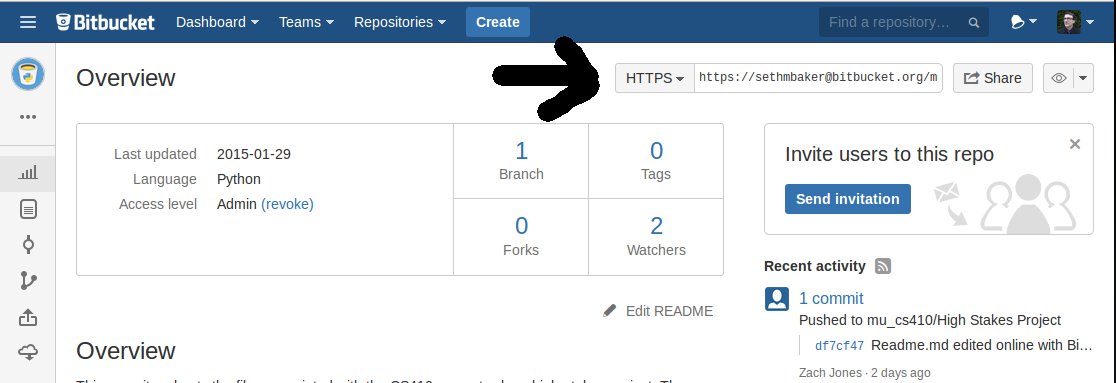
![]() Now push your project to the remote.
Now push your project to the remote. 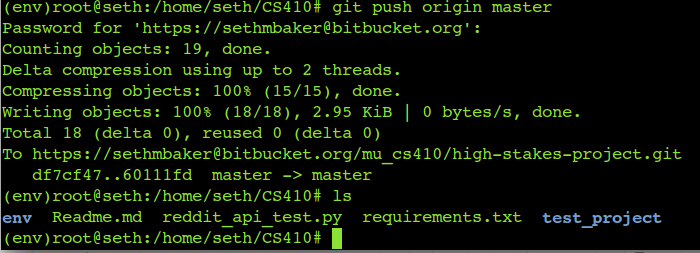 Remember to fetch and merge [or pull] the most recent changes before you begin a development session.
2. Deploy to Heroku
Before deployment, you’ll need at least a bare bones web application that runs on a local development server. See the “Supported Languages” page on Heroku for details and deployment instructions for your language. Assuming you’re running locally, here’s an overview of the deployment steps:
- Create an account on Heroku, download the Heroku Toolbelt for your OS, and login. When you create a project, a PostgreSQL database should be created for you.
- Adding a heroku remote depends on if you’re starting a project or if you want to connect to an existing project. This tutorial assumes you’re creating a new project. Here’s how to collaborate on a project.
- For a new project, the git remote is added to your existing repo when you run ‘heroku create’. Make sure to run this from the top level of your project directory after you’ve created a local repo. Run
‘$heroku create’
This will add another git remote to your local repo. (Heroku will be your production remote, which is separate from your Bitbucket origin.) - Configure your Procfile. The Profile tells Heroku what applications are required run your app. Details can be found in your language-specific tutorial on Heroku. This file must be in your project root directory. The Procfile should be added to your repo before you deploy to Heroku.
- Deploy your code
$git push heroku master
- Run “$ heroku logs” for error messages, then go search Stack Overflow to figure out what went wrong until you get it working 🙂
Good luck!
How’d it go for you?
This is my first technical tutorial here on Happenchance, so I’d love to hear your feedback. Please let me know in the comments if this tutorial help you, or if there’s anything that’s entirely wrong.
Resources
Git, Git-Bash, and Cygwin
Git cheat sheet (printable)
Getting Started With Bitbucket
Heroku Getting Started, Heroku Supported Languages, and an Introduction to Heroku from the co-creator of Django.